Practice Lab 16 – Troubleshooting
Scenario
In this lab, you will learn how to monitor and debug desktop flows.
High-level lab objectives
-
Monitor desktop flows
-
Debug desktop flows
-
Add retry to desktop flow
Exercise #1: Monitor flows
In this exercise, you will monitor desktop flows.
Task #1: Monitor desktop flows
-
Navigate to https://make.powerautomate.com/ and make sure you are in your dev environment.
-
Click on More and select Discover all.
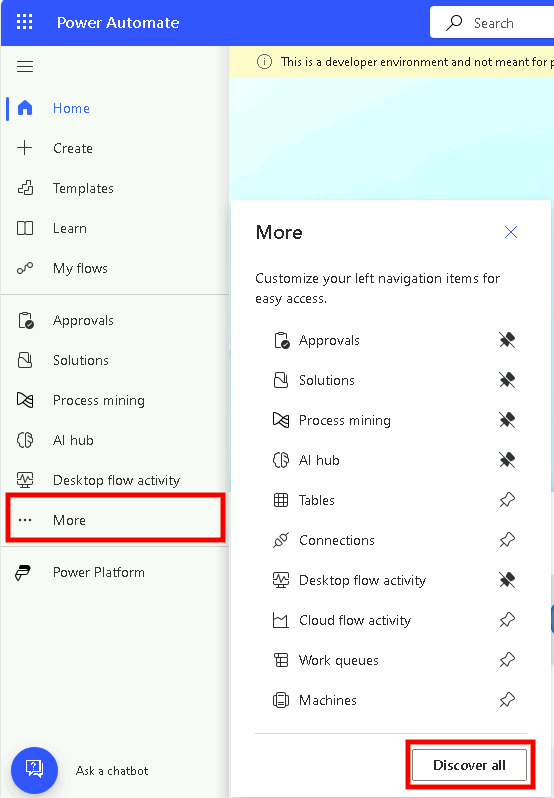
- Under Monitor select Desktop flow runs.

-
If you don’t see anything, make sure you are in your Dev environment.
-
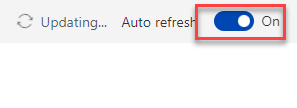
Turn on Auto refresh.
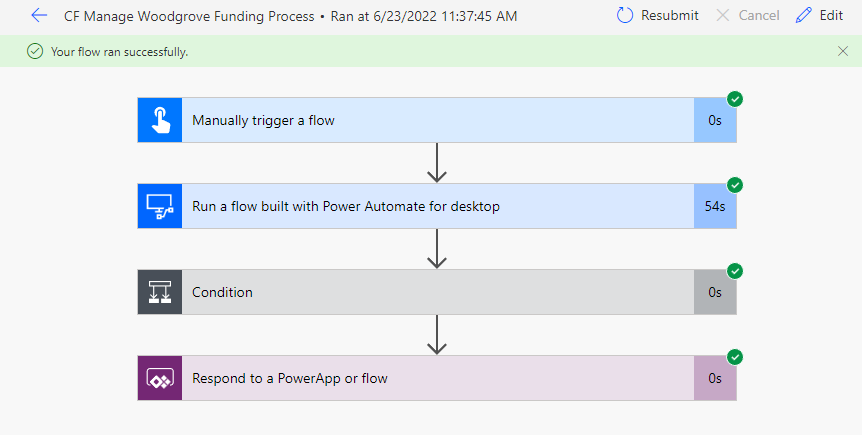
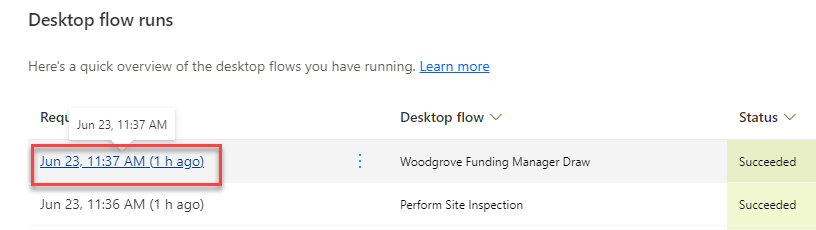
- Click on the ellipses of one the Woodgrove Funding Manager Draw run and select See parent flow run.

- You should see the parent cloud flow run (CF Manage Woodgrove Funding Process).
-
Click on the browser back button.
-
Click to open the Woodgrove Funding Manager Draw run.
- You should see all the actions in the flow run.
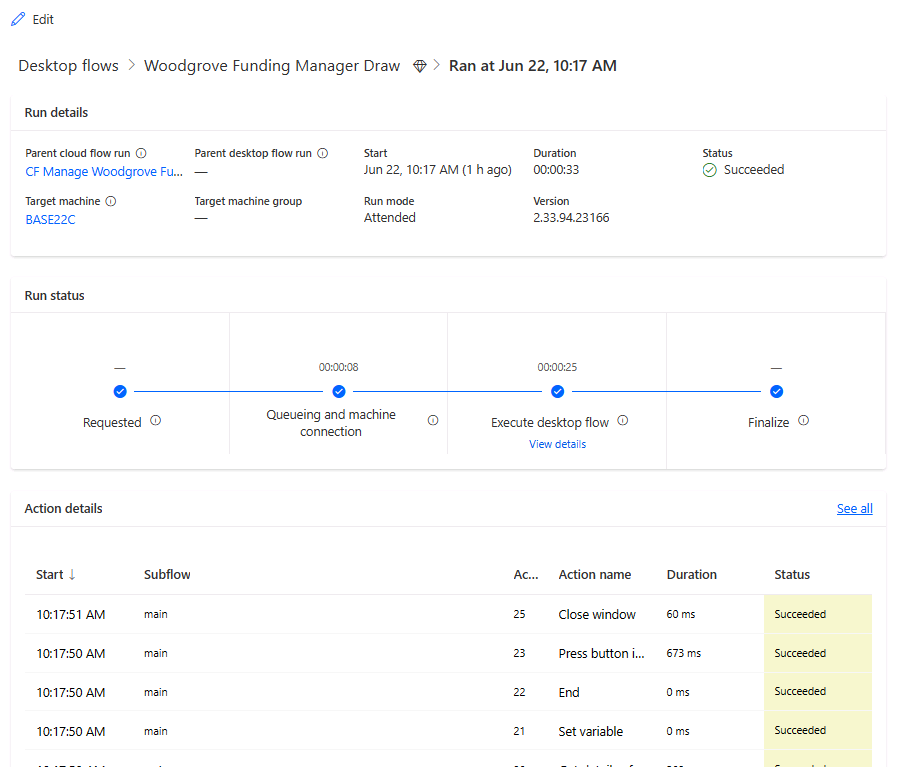
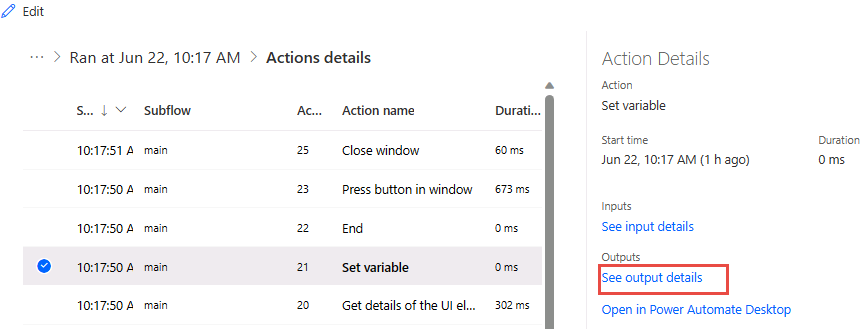
- Click on the start timestamp to open the Set variable action.

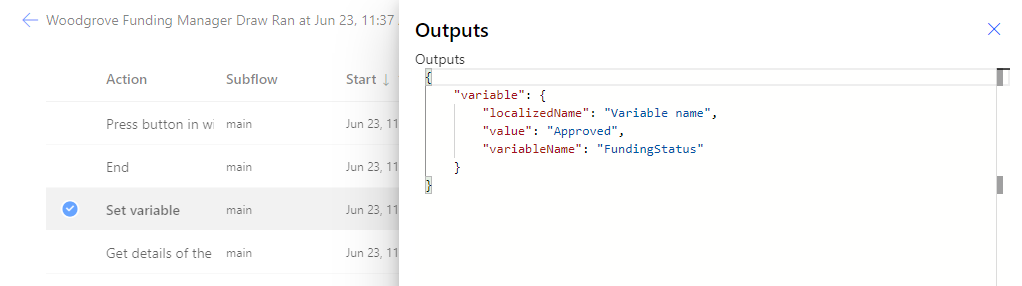
- Go to the Action Details pane and click See output details.
- You should see details of the variable.
-
Close the Outputs pane.
-
You may wish to review the other actions.
Task #2: Flow monitor
-
Launch Power Automate for desktop, make sure your dev environment is selected.
-
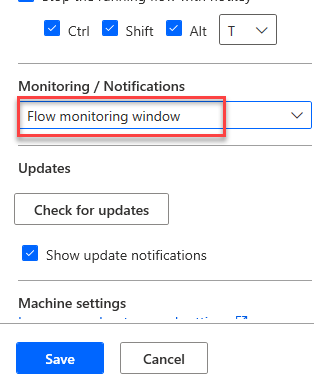
Click Settings.

- Click on the Monitoring/Notifications dropdown, select Flow monitoring window, and click Save.
-
Close the Settings pane.
-
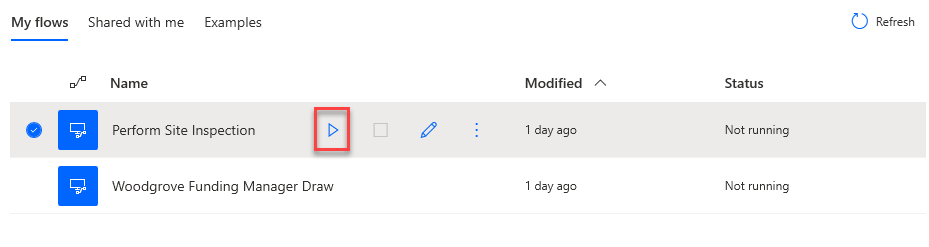
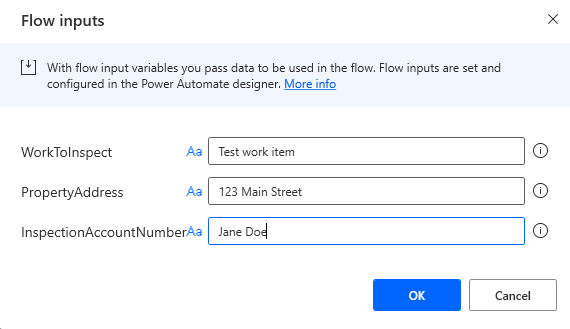
Run the Perform Site Inspection.
- Click OK.
- Notice the monitor. Click Pause.
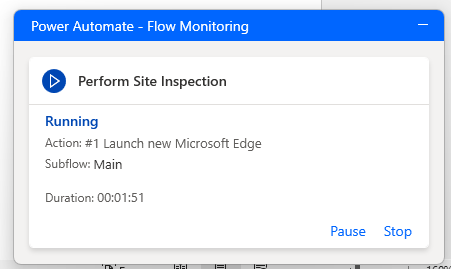
- The flow should pause. Click Resume.
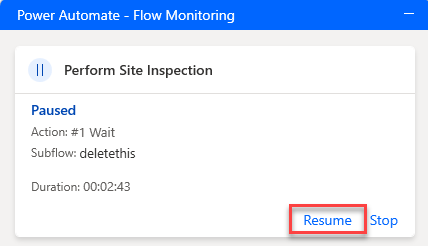
- Click Stop. The flow should stop, and the monitor should disappear.
Exercise #2: Debug flows
Task #1: Debug flow
-
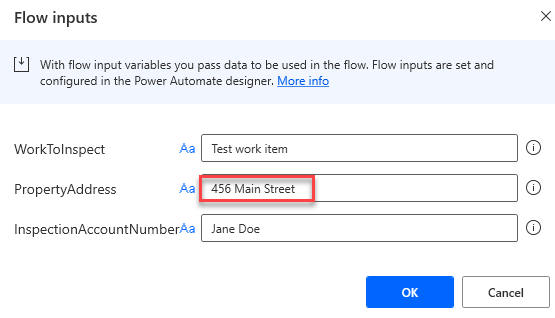
Go to Power Automate desktop flow and run the Perform Site Inspection flow again.
-
Enter 456 Main Street for Address and click OK.
-
Wait for the flow to finish running.
-
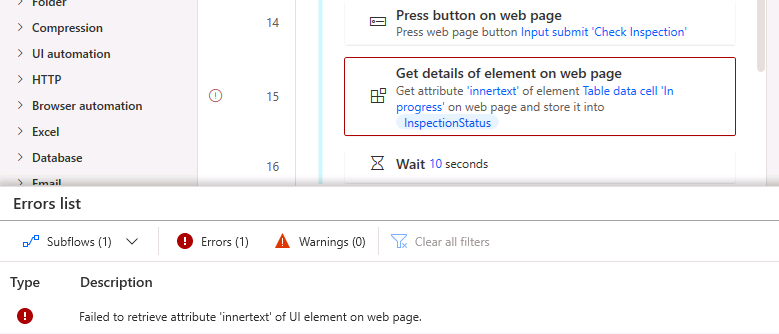
The flow should fail, and you should see an error in the notification.

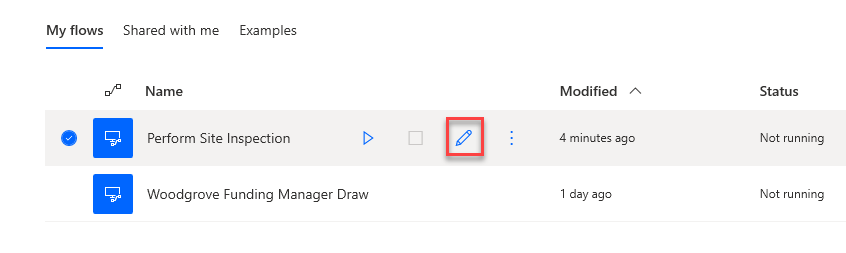
- Click Edit flow.
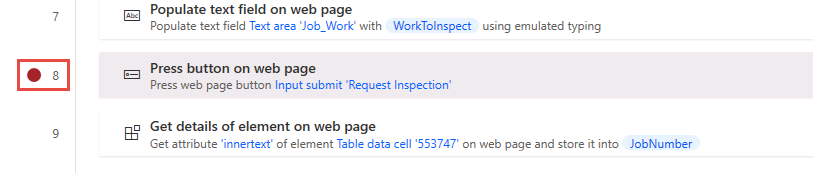
- Add a breakpoint on the first press button action. Clicking to the left of the line number will add a breakpoint.
-
Edit the property address variable and change the default value to 456 Main Street.
-
Click Run.
-
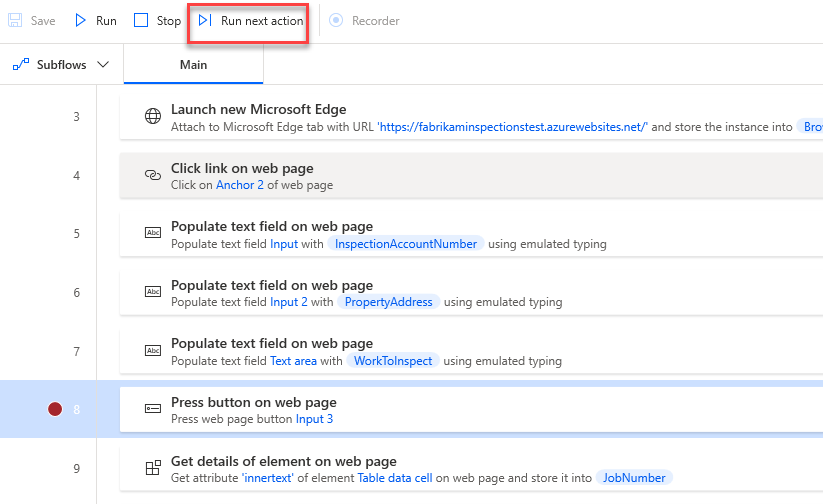
The flow will pause when the breakpoint is hit. Click Run next action.
-
The flow should advance to the next action and pause again. Click Run next action again.
-
Click Run next action until the flow fails.
Task #2: Add retry
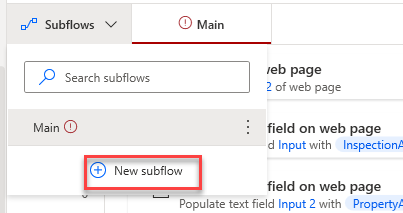
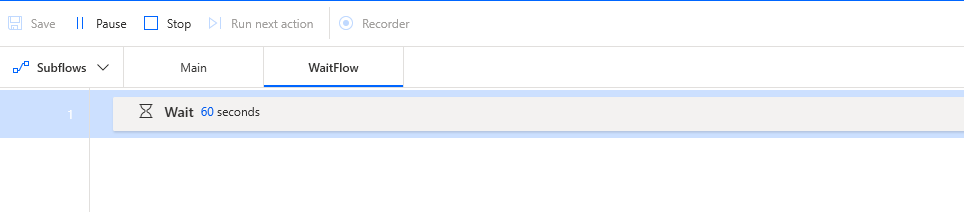
- Click Subflows and select + New subflow.
-
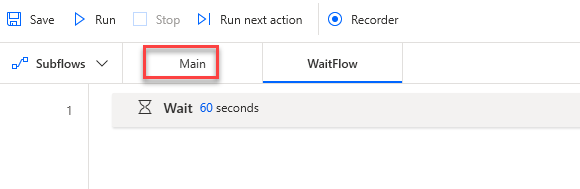
Enter WaitFlow for name and click Save.
-
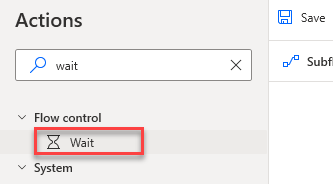
Go to the Actions pane, search for wait and double click on the Wait action.
- Enter 60 and click Save.

- The subflow should now have one wait action. Select the Main tab.
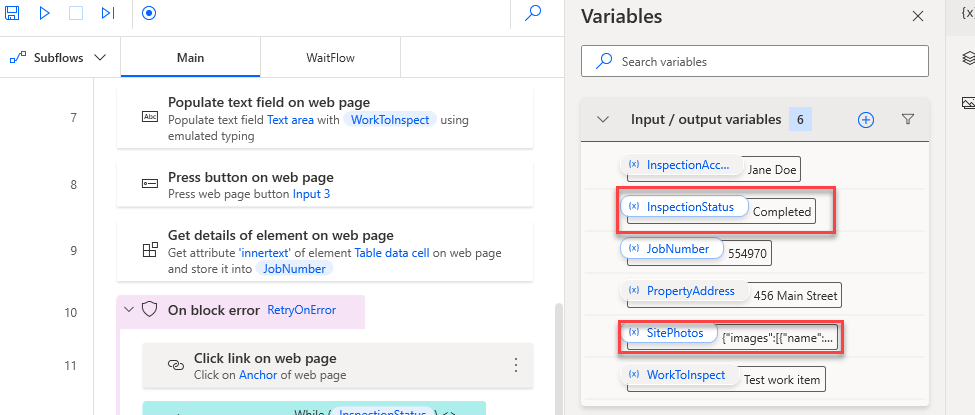
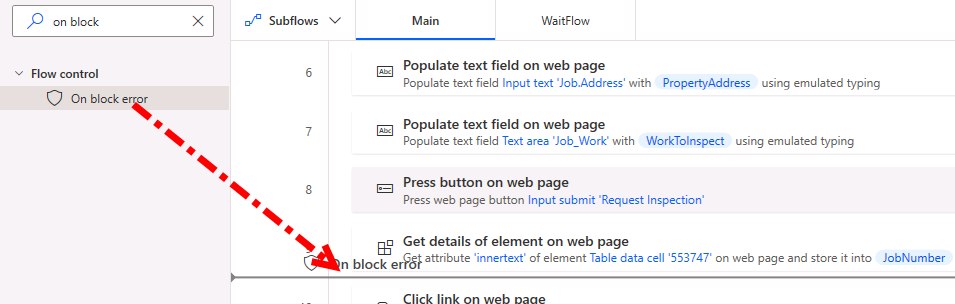
- Go to the Actions pane, search for error, drag On block error action, and place it after the Get details of element on web page for the JobNumber action.
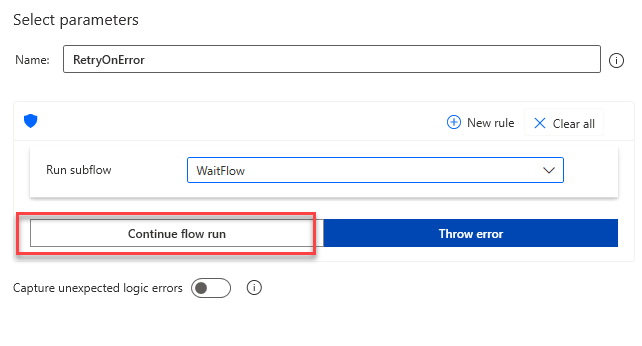
- Enter RetryOnError for Name, click + New rule, and select Run subflow.

- Select the WaitFlow you created and click Continue flow run.
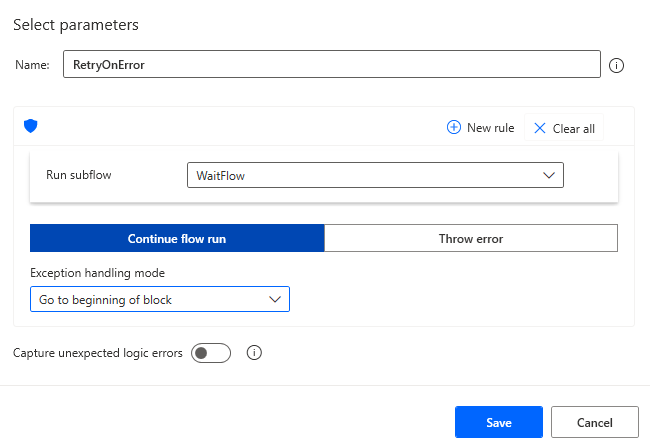
- Select Go to beginning of block for Exception handling mode and click Save.
- Click to select the action below the error block.
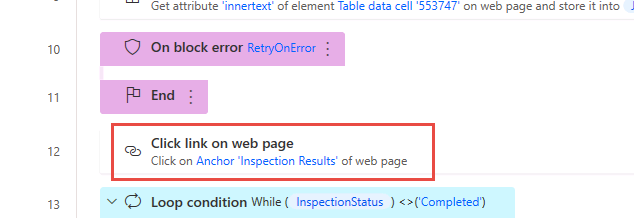
- Hold the [SHIFT] and click to select the End loop action.
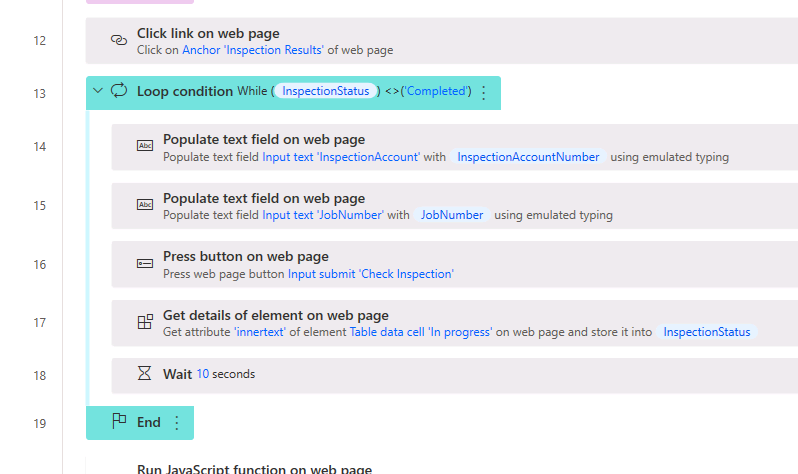
-
Drag all the selected actions and drop them inside the error block.
-
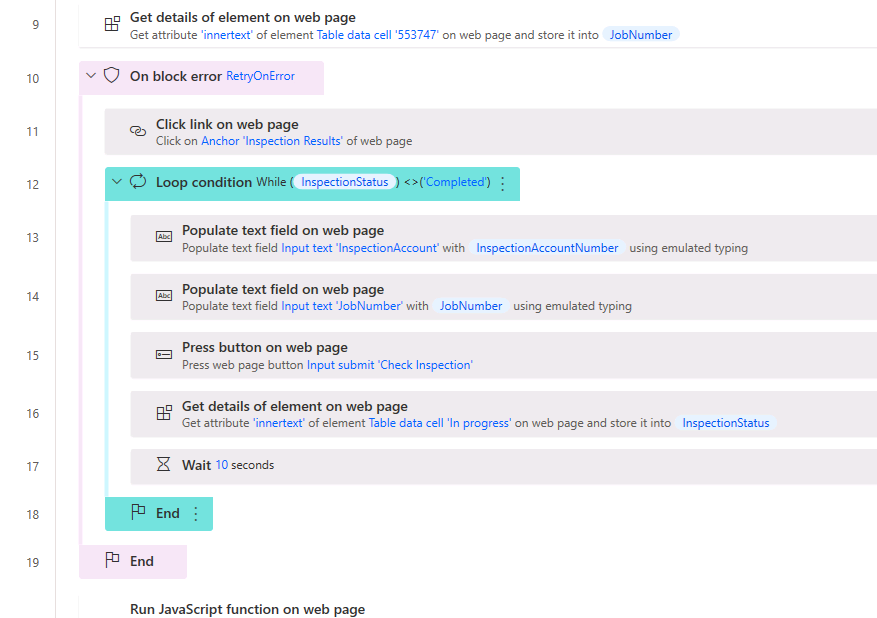
The On block error action should now look like the image below.
- Click Save and wait for the flow to be saved.
Task #3: Test
-
Remove the breakpoint and Click Run.
-
The flow will switch to the subflow if error occurs.
-
The flow will go back to the main flow after 60 seconds.
-
The process should complete successfully.